You need the
setting.perms.manage permission to create or edit roles. By default, only Super Admins have this permission.Assigning Roles to Users
Demo
Demo
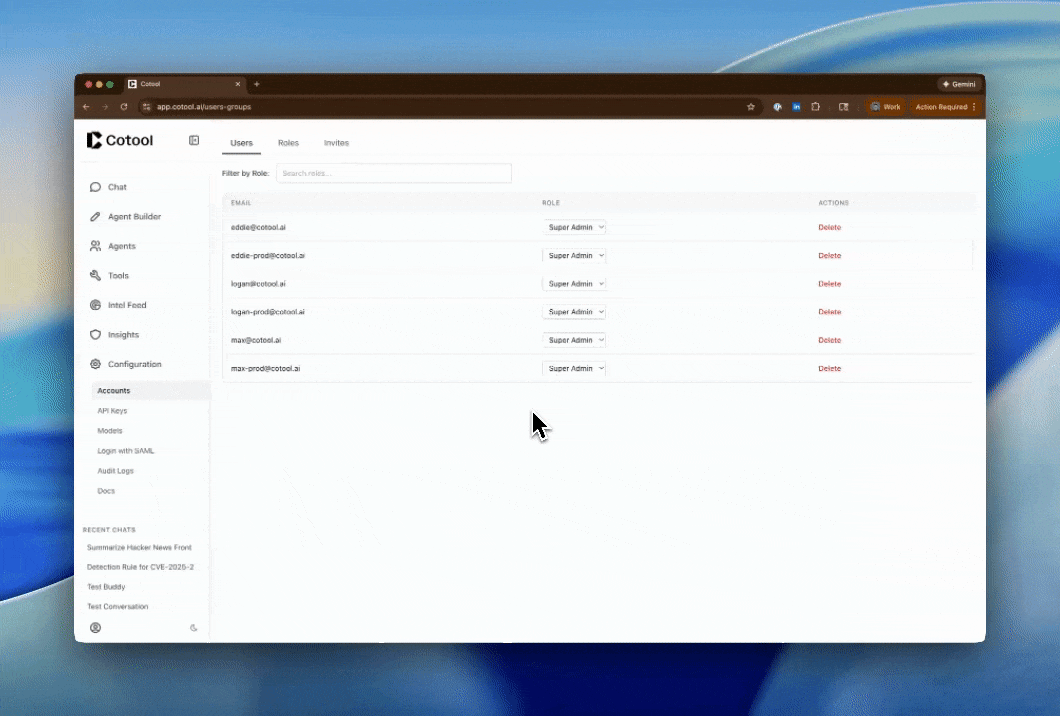
Find the User
Locate the user you want to update in the table. You can use the Filter by Role dropdown to narrow down the list if you have many users.
Change Role
Click the Role dropdown in the user’s row and select the new role from the list. All available roles (both system and custom) will appear here.
Creating a Custom Role
Demo
Demo

Name and Describe
- Name: Short, descriptive name (e.g., “Security Analysts”, “Tier 1 Operators”)
- Description: Explain who this role is for and what they can do
Add Permissions
Click + Add Permission to add each permission:
- Select Action - Choose what can be done (e.g., “Read Agents”)
- Select Scope - Choose “all” or “specific” (if available)
- Select Resource - If “specific”, choose which resource (e.g., which agent or tool)
- Click Add
Review Validation
As you add permissions, Cotool validates them in real-time:
- Yellow warnings appear for missing prerequisite permissions
- Click Quick Fix to automatically add missing permissions
- The Save Role button is disabled until all validation issues are resolved
Inviting New Users
Enter Email and Role
- Email: The user’s email address
- Role: Which role to assign them (defaults to your role if you’re not a Super Admin)
If you don’t have
setting.perms.manage permission, you can only invite users to your own role.Send Invite
Click Send Invite.Note: the user will not receive an email but they will now be able to login
Viewing Role Permissions
To see what permissions a role has:Troubleshooting Permission Issues
User can't see an agent
User can't see an agent
Check:
- Does their role have
agent.readfor that agent (or all agents)? - Does their role have
tool.readfor all tools that agent uses? - Did someone in their role create that agent? (If yes, they should have automatic access)
agent.read and the required tool.read permissions to their role.User can see an agent they shouldn't have access to
User can see an agent they shouldn't have access to
This is likely expected behavior!When any user in a role creates an agent, all other users in that same role automatically get
agent.read, agent.execute, and agent.edit permissions for that specific agent.Example: If “Alice” (Security Operator role) creates the “Phishing Triage” agent, all other Security Operators automatically gain access to that agent—even if their role doesn’t have “all agents” permissions.Fix: Create a separate custom role with different permissions for users who shouldn’t share agent access.User can't execute an agent
User can't execute an agent
Check:
- Does their role have
agent.executefor that agent? - Does their role have
agent.readfor that agent? - Does their role have
tool.usefor all tools that agent uses?
agent.execute, agent.read, and the required tool.use permissions.User can't access settings
User can't access settings
Check:
- Which setting are they trying to access?
- Does their role have the corresponding
setting.*permission?
Can't save role due to validation errors
Can't save role due to validation errors
Symptom: Yellow warning boxes appear showing missing permissions.Fix:
- Read the error message - it tells you which permissions are missing
- Click Quick Fix to automatically add them
- Or manually add the missing permissions using + Add Permission
- Added
agent.executewithoutagent.read - Added
agent.readfor an agent without tool permissions for its tools - Added
tool.usewithouttool.read
Can't delete a user's role
Can't delete a user's role
Symptom: System prevents changing or removing a user’s role.Cause: They are the last Super Admin in your organization.Fix: Promote another user to Super Admin first, then you can change this user’s role.
Common Custom Role Templates
Here are some common custom role configurations:Agent Runner
Use case: Users who need to execute agents in chat but not create or edit them.Agent Builder
Use case: Users who need to create and edit agents but not manage org settings.Limited Scope Role
Use case: Users who need to only access specific agents (e.g., only the Phishing Triage agent).Best Practices
Start with Built-in Roles - The Super Admin and Analyst roles cover most use cases. Only create custom roles when you need fine-grained control.
Use Cloning - Instead of building roles from scratch, clone an existing role and modify it. This reduces validation errors.
Test Before Rollout - After creating a custom role, assign it to a test user (or yourself) and verify they can access what they need before assigning to multiple users.
Document Custom Roles - Use the description field to explain who should be assigned to each custom role and why.
Review Regularly - Periodically audit your custom roles. Remove roles that are no longer needed and update permissions as your org’s needs change.
Audit Trail
All role and permission changes are logged in the Audit Logs (if you havesetting.auditLog.read permission):
- Role creation/deletion
- Permission changes (what was added/removed)
- User role assignments
- Who made each change and when